How to add Table of content to your blog post in WordPress?
Post author:
Post published:September 14, 2024
here is the short video for reference, if your not video person then here is the step-by-step instructions to follow
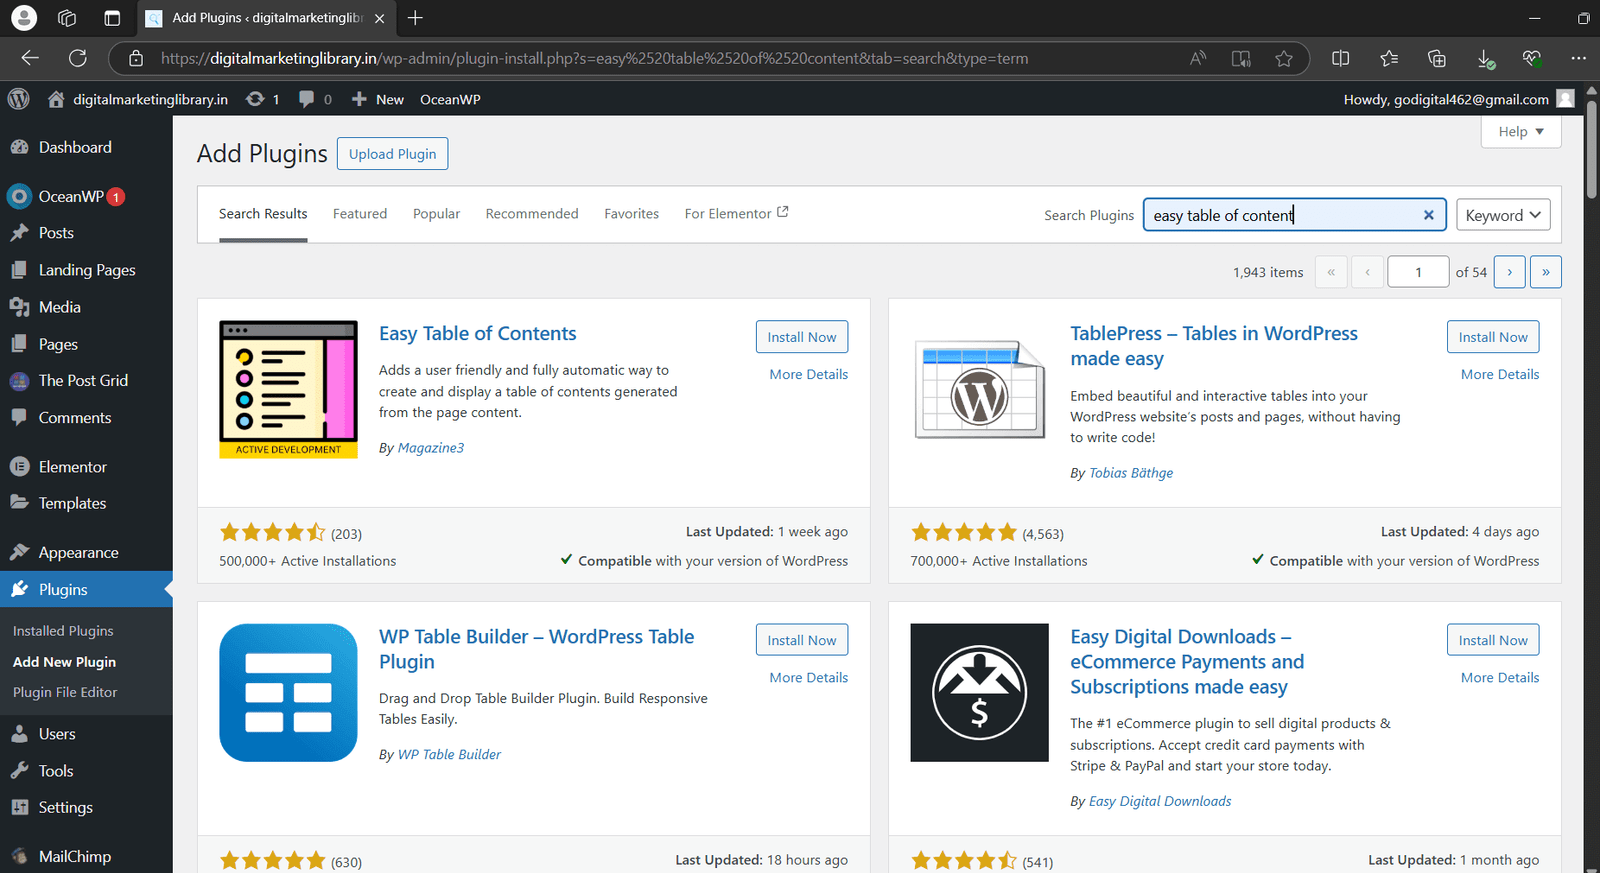
STEP 1 : INSTALL AND ACTIVATE THE PLUGIN
1. for this Go to your dashboard then click on plugins
2.click on Add new plugin
3. now we will search for the plugin “easy table of contents”
4. click on install
5. Activate the plugin
After activating it will take you to the dashboard of the plugin.
we have successfully installed and activated the plugin .
STEP 2 : SETTINGS
1.Go to settings
2 . now here is the thing to understand for what you want table of content for . if it is for blog post or for pages , landing page . so for now we will click to posts. if you want for others also then you’ll just simply click to the box
3. Position : where you want your table of content on page commonly people keep it before the first headline. the logic behind it is when reader will come to your page he/she can get the idea what they can get in this post . so it’s basically reealted with user experience .
4. Alignment : this is again related to where your table should be present left ,right or in centeA
5 . Theme : first of all click on Custome option if you want to change any of the following . here you can change colors of your text, background , inks its hover and font size as well . if you don’t choose custom option then changes will not apply this is from my personal experience so pay attention to the small details .
now just save all this changes .
we are all done here .
Note : we can also choose a particular page on which we want to add table of content and where not .hope this was helpful . appreciate the patience you just shown. lets meet on another blog .we have blogs on related topics so just have a look on that as well .
“If you want to create a great product, just focus on one person. Make that one person have the most amazing experience ever.”


Recent Comments