
URL parameters are essential for tracking traffic sources and campaign performance. In this guide, we’ll walk you through adding URL parameters to your page and capturing them using Ninja Forms.If you’re new to forms and marketing campaigns, you may wonder how to capture information like where visitors come from, which campaign brought them to your website, or what keywords they searched for. This is possible by using URL parameters .
Table of Contents
ToggleWhat Are URL Parameters?
URL parameters are pieces of information added to a link to track specific details. For example:https://new.digitalmarketinglibrary.in/?utm_source=google&utm_medium=cpc&utm_campaign=newcampaign&utm_term=digitalmarketing
- utm_source: Tells the source of traffic (e.g., Google).
- utm_medium: Tells the type of traffic (e.g., CPC for paid ads).
- utm_campaign: Tells the name of the campaign (e.g., “newcampaign”).
- utm_term: Tells the keyword or search term (e.g., “digitalmarketing”).
When a visitor clicks this link and fills out a form on your site, the data from these parameters will be captured.
Important Points to Remember Before You Start
Important Points to Remember Before You Start
1.Original and Updated URLs Are Different:
If your original link is – https://new.digitalmarketinglibrary.in/
And you add parameters like this –

Google will treat them as two different pages.
2 .Use the Updated URL for Specific Campaigns Only:
Use this updated URL in ads, emails, or anywhere you want to track details. For regular traffic or blogs, continue using the original link.
Step-by-Step Guide to Update the URL and Track Data
Step 1: Create an Updated URL
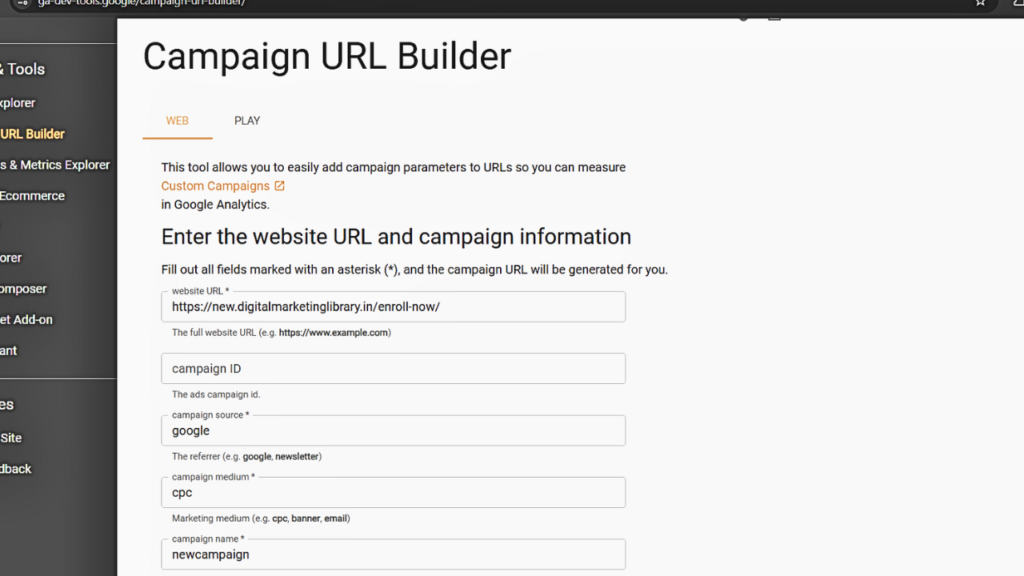
To create a link with URL parameters, use a free tool like the Google Campaign URL Builder. Here’s how:
- Open the URL builder tool (just search for it online like chrome , google)
2. Enter your website’s original link (e.g., https://new.digitalmarketinglibrary.in/).
Fill out the parameters:
- utm_source: The traffic source (e.g., “google”).
- utm_medium: The type of traffic (e.g., “cpc”).
- utm_campaign: The campaign name (e.g., “newcampaign”).
- utm_term: The keyword or search term (optional).
- Copy the generated link, which will look something like this:

you can shorten the link just click on shorten link .
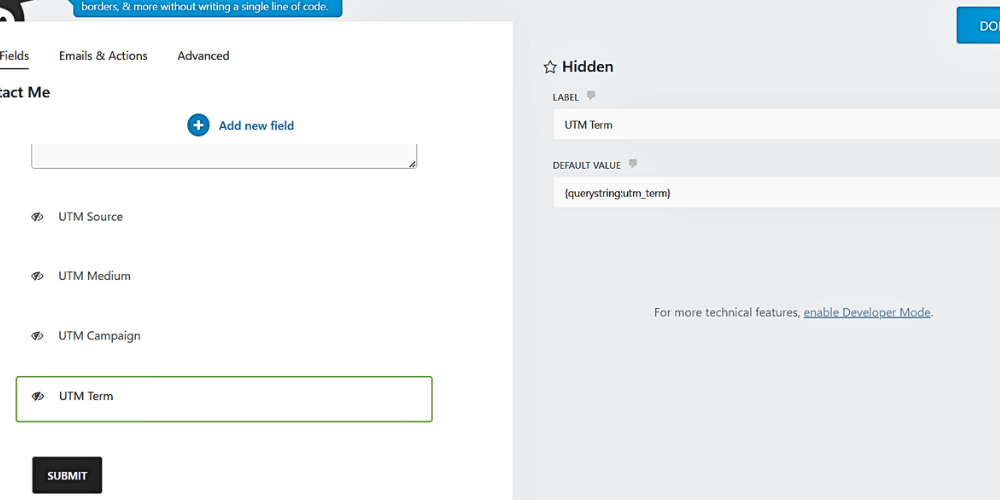
Step 2: Add Hidden Fields in Ninja Forms
Hidden fields allow your form to capture the parameters without showing them to users.
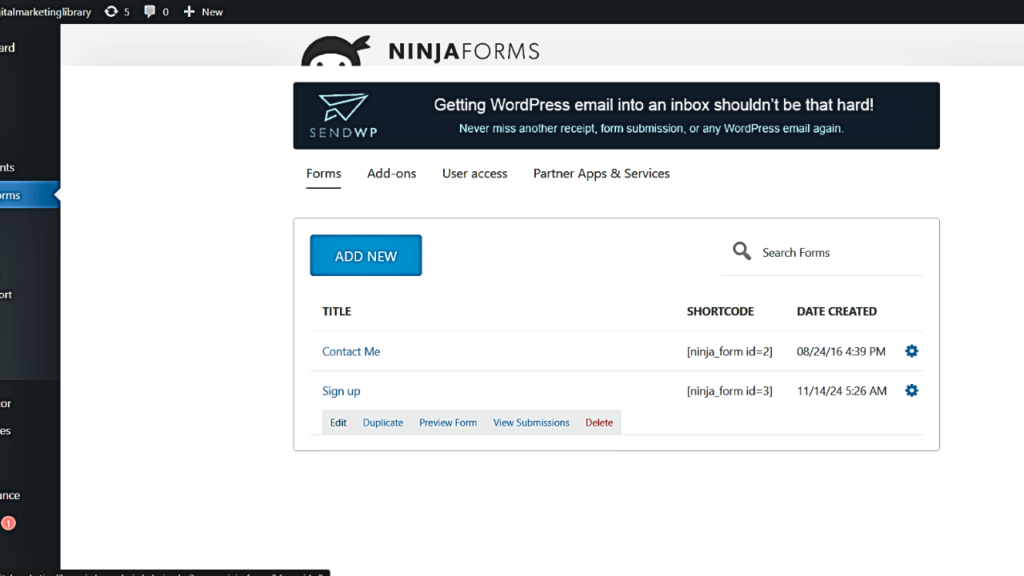
- Open Ninja Forms Editor:
Go to your WordPress dashboard, navigate to Ninja Forms, and open the form you want to edit.
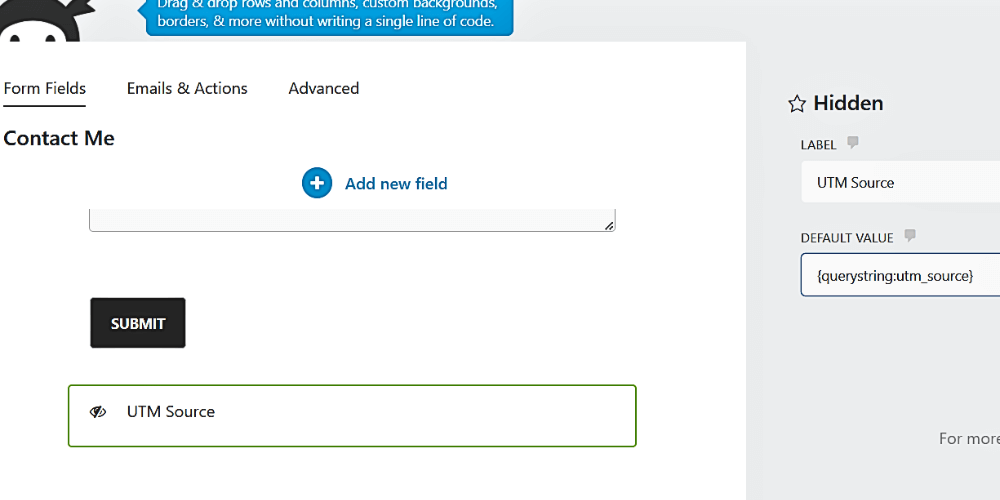
Add Hidden Fields:
Add one hidden field for each parameter:
after opening form click on “+” icon to Add new fields and look for Hidden option

now click on the hidden field you just add here you’ll get label and default value option just add the parameter name and default value and click on done button .add other utm parameters by repeating this process.
just like this
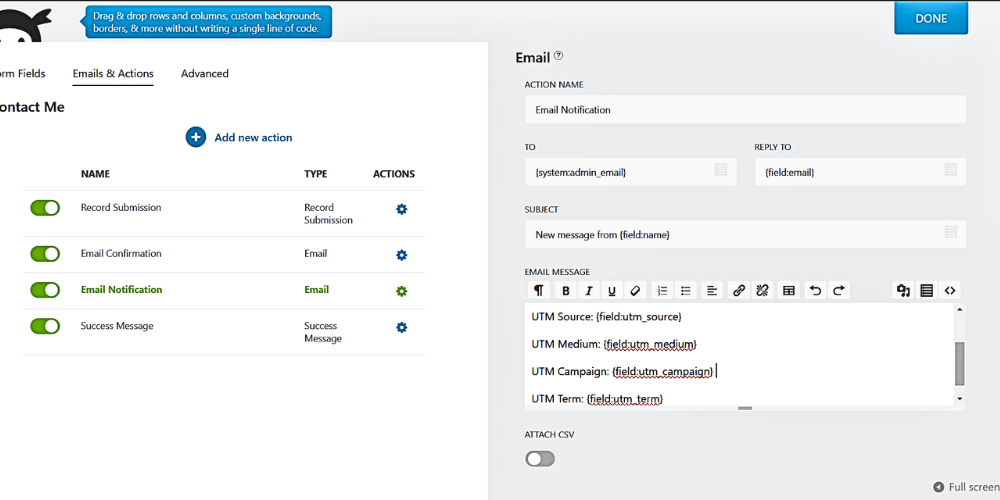
Step 3: Configure Email Notifications
Set up your form so that the captured data is included in the email you receive after submission.
- Go to the Emails & Actions tab in the form settings.
- Edit the email notification.
- Add the hidden field data to the email body:
- click on done button.
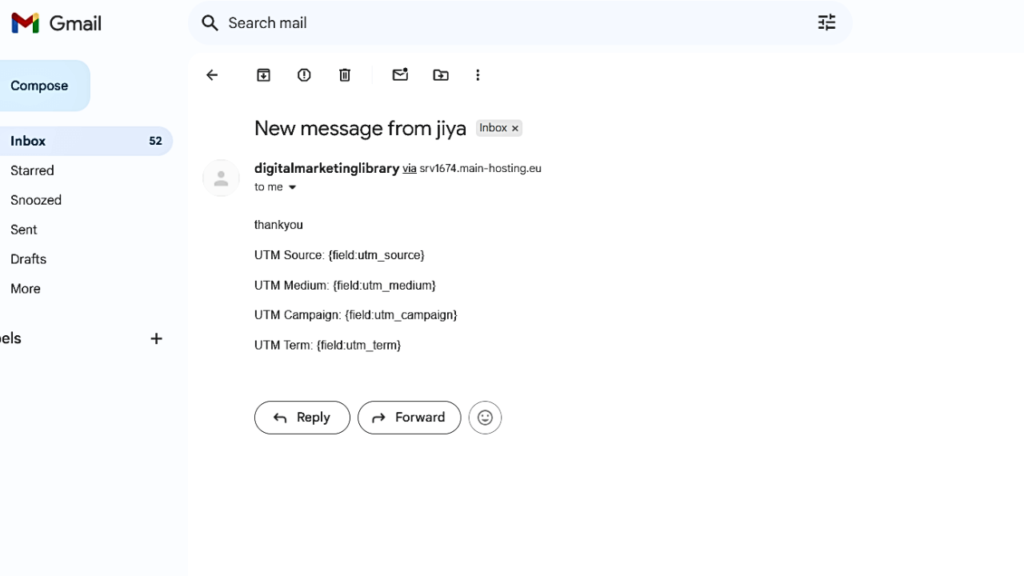
Step 4: Test Your Setup
- Open the updated URL with url parameters in your browser:
- Fill out and submit the form.
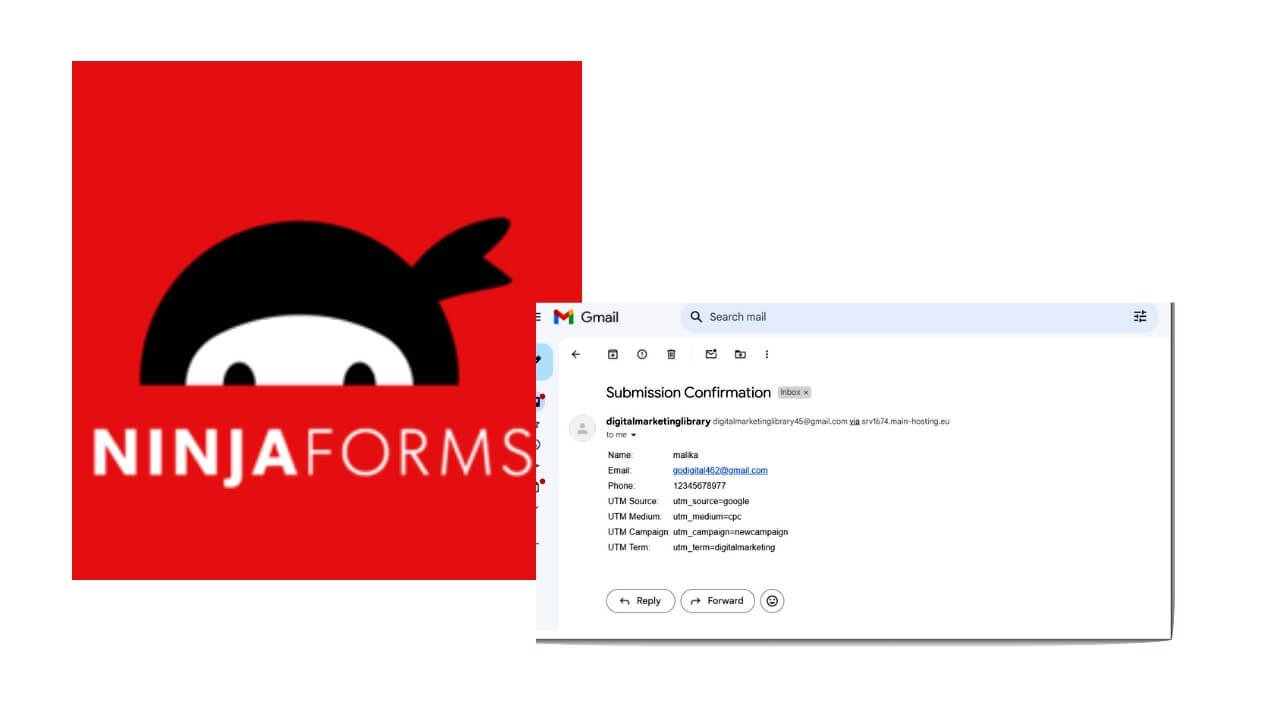
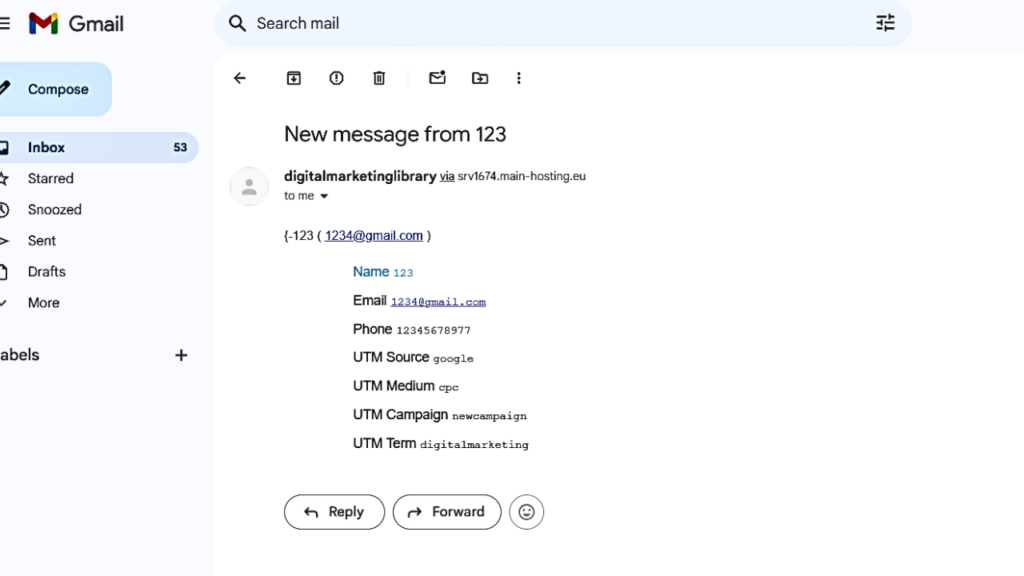
- Check your email. It should contain the UTM data, like the image shows below:
- Open the updated URL with url parameters in your browser:

Common issue:
The issue with your email showing {field:utm_source}, {field:utm_medium}, etc., instead of actual UTM data indicates that the form isn’t capturing the parameters correctly.
1: Incorrect Hidden Field Setup:
Here’s how to troubleshoot and resolve it step by step:
- Go to your Ninja Form editor.
- Check that each hidden field has the correct Default Value set:
- UTM Source:
{querystring:utm_source} - UTM Medium:
{querystring:utm_medium} - UTM Campaign:
{querystring:utm_campaign} - UTM Term:
{querystring:utm_term}
- UTM Source:
- Save the form after verifying these values.
- also check email notification field and save
if it still look the same .then you may have other cause .
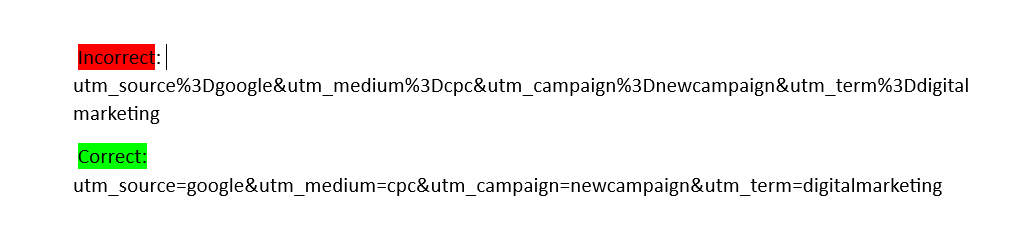
2: URL Parameter Encoding Issue:
The issue arises because the equals sign (=) in your UTM parameters has been encoded as %3D. This encoding causes tools like Ninja Forms to misinterpret the parameter data. To fix this, you need to ensure the URL uses properly formatted UTM parameters.
Here’s how to troubleshoot and resolve it step by step:
1. Access a URL Builder Tool
Use any reliable URL builder tool like:
2. Recheck & if needed Enter the correct Information again
Fill in the fields provided in the tool:
Website URL
- Enter your base URL (e.g.,
https://new.digitalmarketinglibrary.in/enroll).
- Enter your base URL (e.g.,
Campaign Source (utm_source)
- Specify the source of traffic (e.g.,
google,facebook,newsletter).
- Specify the source of traffic (e.g.,
Campaign Medium (utm_medium)
- Define the medium used (e.g.,
cpc,email,organic).
- Define the medium used (e.g.,
Campaign Name (utm_campaign)
- Name the campaign (e.g.,
newcampaign,sale2024).
- Name the campaign (e.g.,
Campaign Term (Optional) (utm_term)
- Use this to track keywords if applicable (e.g.,
digitalmarketing).
- Use this to track keywords if applicable (e.g.,
Campaign Content (Optional) (utm_content)
- Specify different versions of ads or links if required.
3. Generate the URL
Once all fields are filled, the tool will automatically generate the complete URL with parameters.
Example Generated URL

4. Use the Updated URL
- Replace your old URL with this updated one wherever needed.
- Use this updated URL in emails, social media, ads, or other campaigns.
- ll required details.
5. Go to email
Open Ninja Forms: Navigate to the form editor.
- Go to Emails & Actions: Select the email notification action.
- Locate the Email Body Field: It’s a text area where you can customize the email content.
- Add Placeholders: Use placeholders like:
Name: {field:name}Email: {field:email}Phone: {field:phone}UTM Source: {field:utm_source}UTM Medium: {field:utm_medium}UTM Campaign: {field:utm_campaign}UTM Term: {field:utm_term}
You can format the email body as you like using these placeholders, ensuring it captures all required details.
I hope this help I know it can be overwhelming for beginners but trust me it’s worth at the end just keep practicing face the problems .more problems you will face today the better you will become tomorrow.


